
Links at the end of the post
When I bought my first home, I knew I wasn’t buying my dream house—I was buying a house that I could turn into my dream home one DIY project at a time.
And my kitchen definitely needed some love.
We were starting with pink walls, dated countertops, older tile floors, and finishes that just didn’t feel like me. But instead of completely gutting the kitchen and spending thousands of dollars on a renovation, I decided to work with what I already had.
And honestly? This kitchen is the perfect example of why I always tell beginner DIYers that you do not have to renovate everything at once.
Here’s everything I did to take my kitchen from dated to a space that actually feels like home.
The Kitchen Before
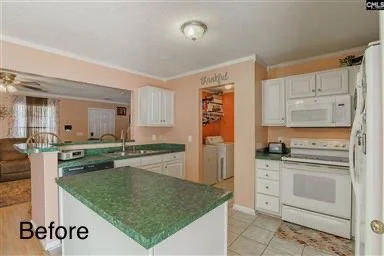
The original kitchen wasn’t necessarily in bad condition—it was just dated.
I had pink-toned walls, dark green countertops, beige tile floors, white cabinets, and finishes that didn’t really work together.
Since the cabinets were still functional and the overall layout worked for me, I decided there was no reason to rip everything out.
Instead, I focused on the changes that would give me the biggest visual impact without the price tag of a full kitchen renovation.
1. Painting Made the First BIG Difference
If you've been keeping up with KJ for a while, you already know how I feel about paint.
It is one of the easiest and most affordable ways to completely change how a room feels.
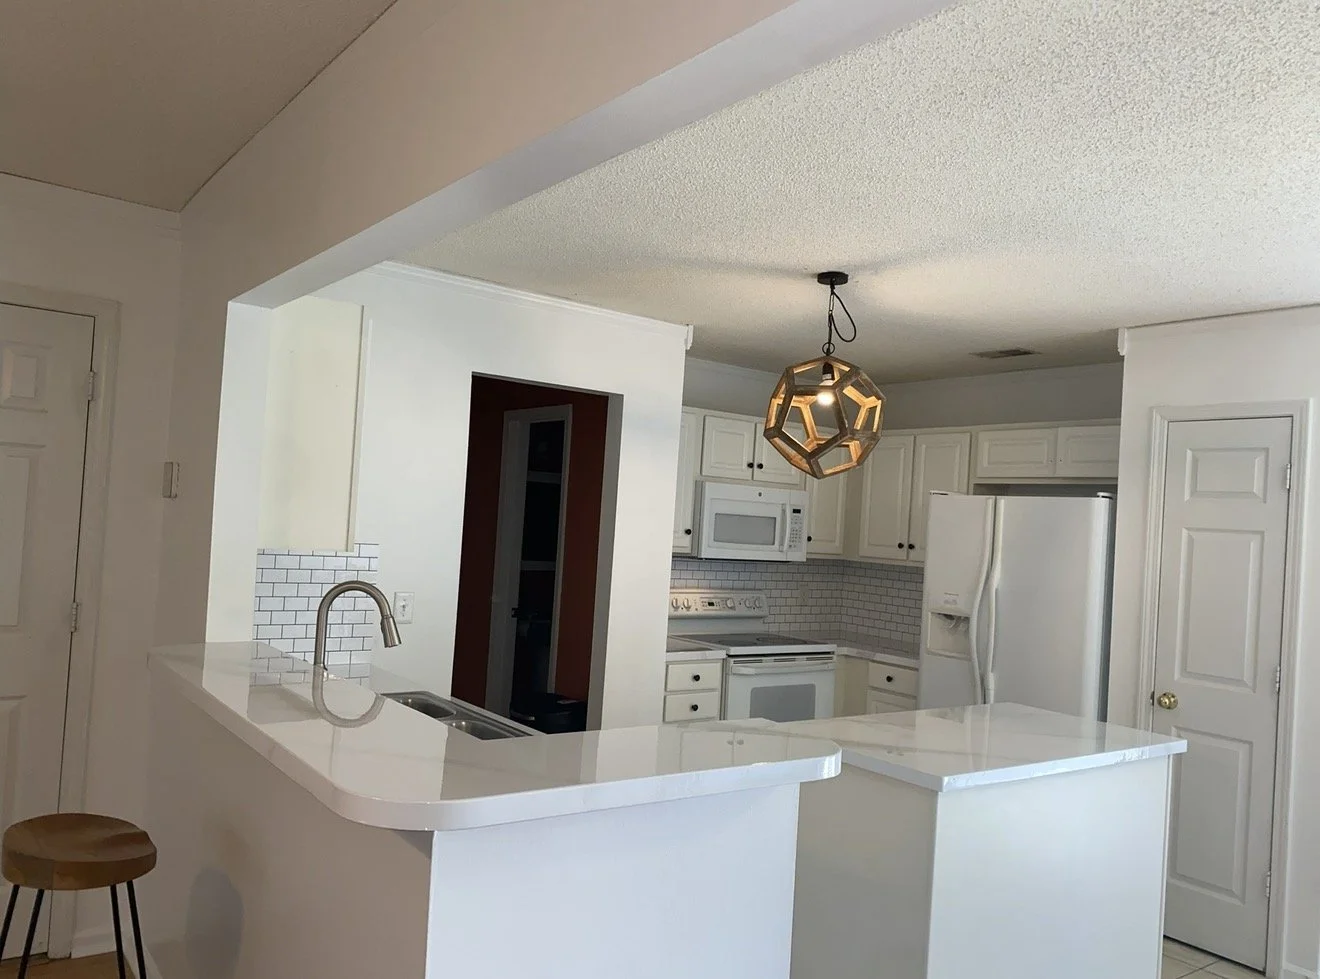
Getting rid of the pink walls immediately made the kitchen feel brighter, cleaner, and more modern. It also gave me a much more neutral backdrop for the other changes I wanted to make.
This is also why painting is one of my favorite projects for beginner DIYers. You don't need a workshop full of power tools to completely change a room.
2. I Updated My Existing Countertops Instead of Replacing Them
This was easily one of the biggest transformations in the entire kitchen.
Instead of ripping out my existing countertops and replacing them with expensive stone, I refinished them to create a bright, marble-inspired finish.
I used products from Stone Coat Countertops to transform the old dark green countertops.
And yes—you can actually do this over existing countertops.
The process involved prepping the existing surface, creating the new finish and then applying the epoxy system that gives the countertops that glossy, stone-like appearance.
The difference is HUGE.
Want to Try Stone Coat Countertops?
If you're thinking about tackling your own DIY countertop makeover, you can save 10% on Stone Coat Countertops products with my discount code:
KEEPINUPWITHKJ
Link this link https://www.stonecoatcountertops.com/?oid=4&affid=1326 AND
Use code KEEPINUPWITHKJ at checkout for 10% off your order.
Affiliate disclosure: If applicable, add your standard disclosure here explaining that you may earn a commission from purchases made through your links at no additional cost to the reader.
3. I Added a Classic Subway Tile Backsplash
Next up: the backsplash.
I went with classic white subway tile and darker grout.
This was another update that made the kitchen feel dramatically different without changing the cabinets or layout.
The white tile kept everything bright while the darker grout added contrast and helped define the subway tile pattern.
It's also a look that works with so many different styles, which was important because I knew my home—and my style—would continue evolving.
The Final Kitchen
Would I DIY My Countertops Again?
Yes—but this is definitely one of those projects where prep matters.
If you're considering refinishing your existing countertops, take your time during the preparation stage and don't rush through the instructions just because you're excited to get to the fun part.
The payoff can be pretty incredible, especially if replacing your countertops isn't currently in the budget.
Shop my Kitchen Below
And if you're using Stone Coat Countertops for your project, don't forget:
Save 10% at Stone Coat Countertops
Use code KEEPINUPWITHKJ for 10% off your Stone Coat Countertops order.
AND